Muttley
Members
-
Joined
-
Last visited
-
Now that you mention that, I think I also had to do that once.. I'd re-calibrate based on the new MV Value and keep an eye on it. Good luck :)
-
I'm not sure what's causing the issue but I'm wondering if the voltage that's powering the sensor is providing stable voltages? I installed a Meanwell power supply and then a DC - DC Buck converter to try keep the power as stable as possible. Perhaps this could help?
-
Thanks so much!! This is awesome 😍
-
-
-
 WannabeSolarSparky reacted to a post in a topic:
Home Assistant Sunsynk Power Flow Card and Dashboard
WannabeSolarSparky reacted to a post in a topic:
Home Assistant Sunsynk Power Flow Card and Dashboard
-
Please share your YAML... I need this on my dashboard 😁
-
-
-
Sold off forum
-
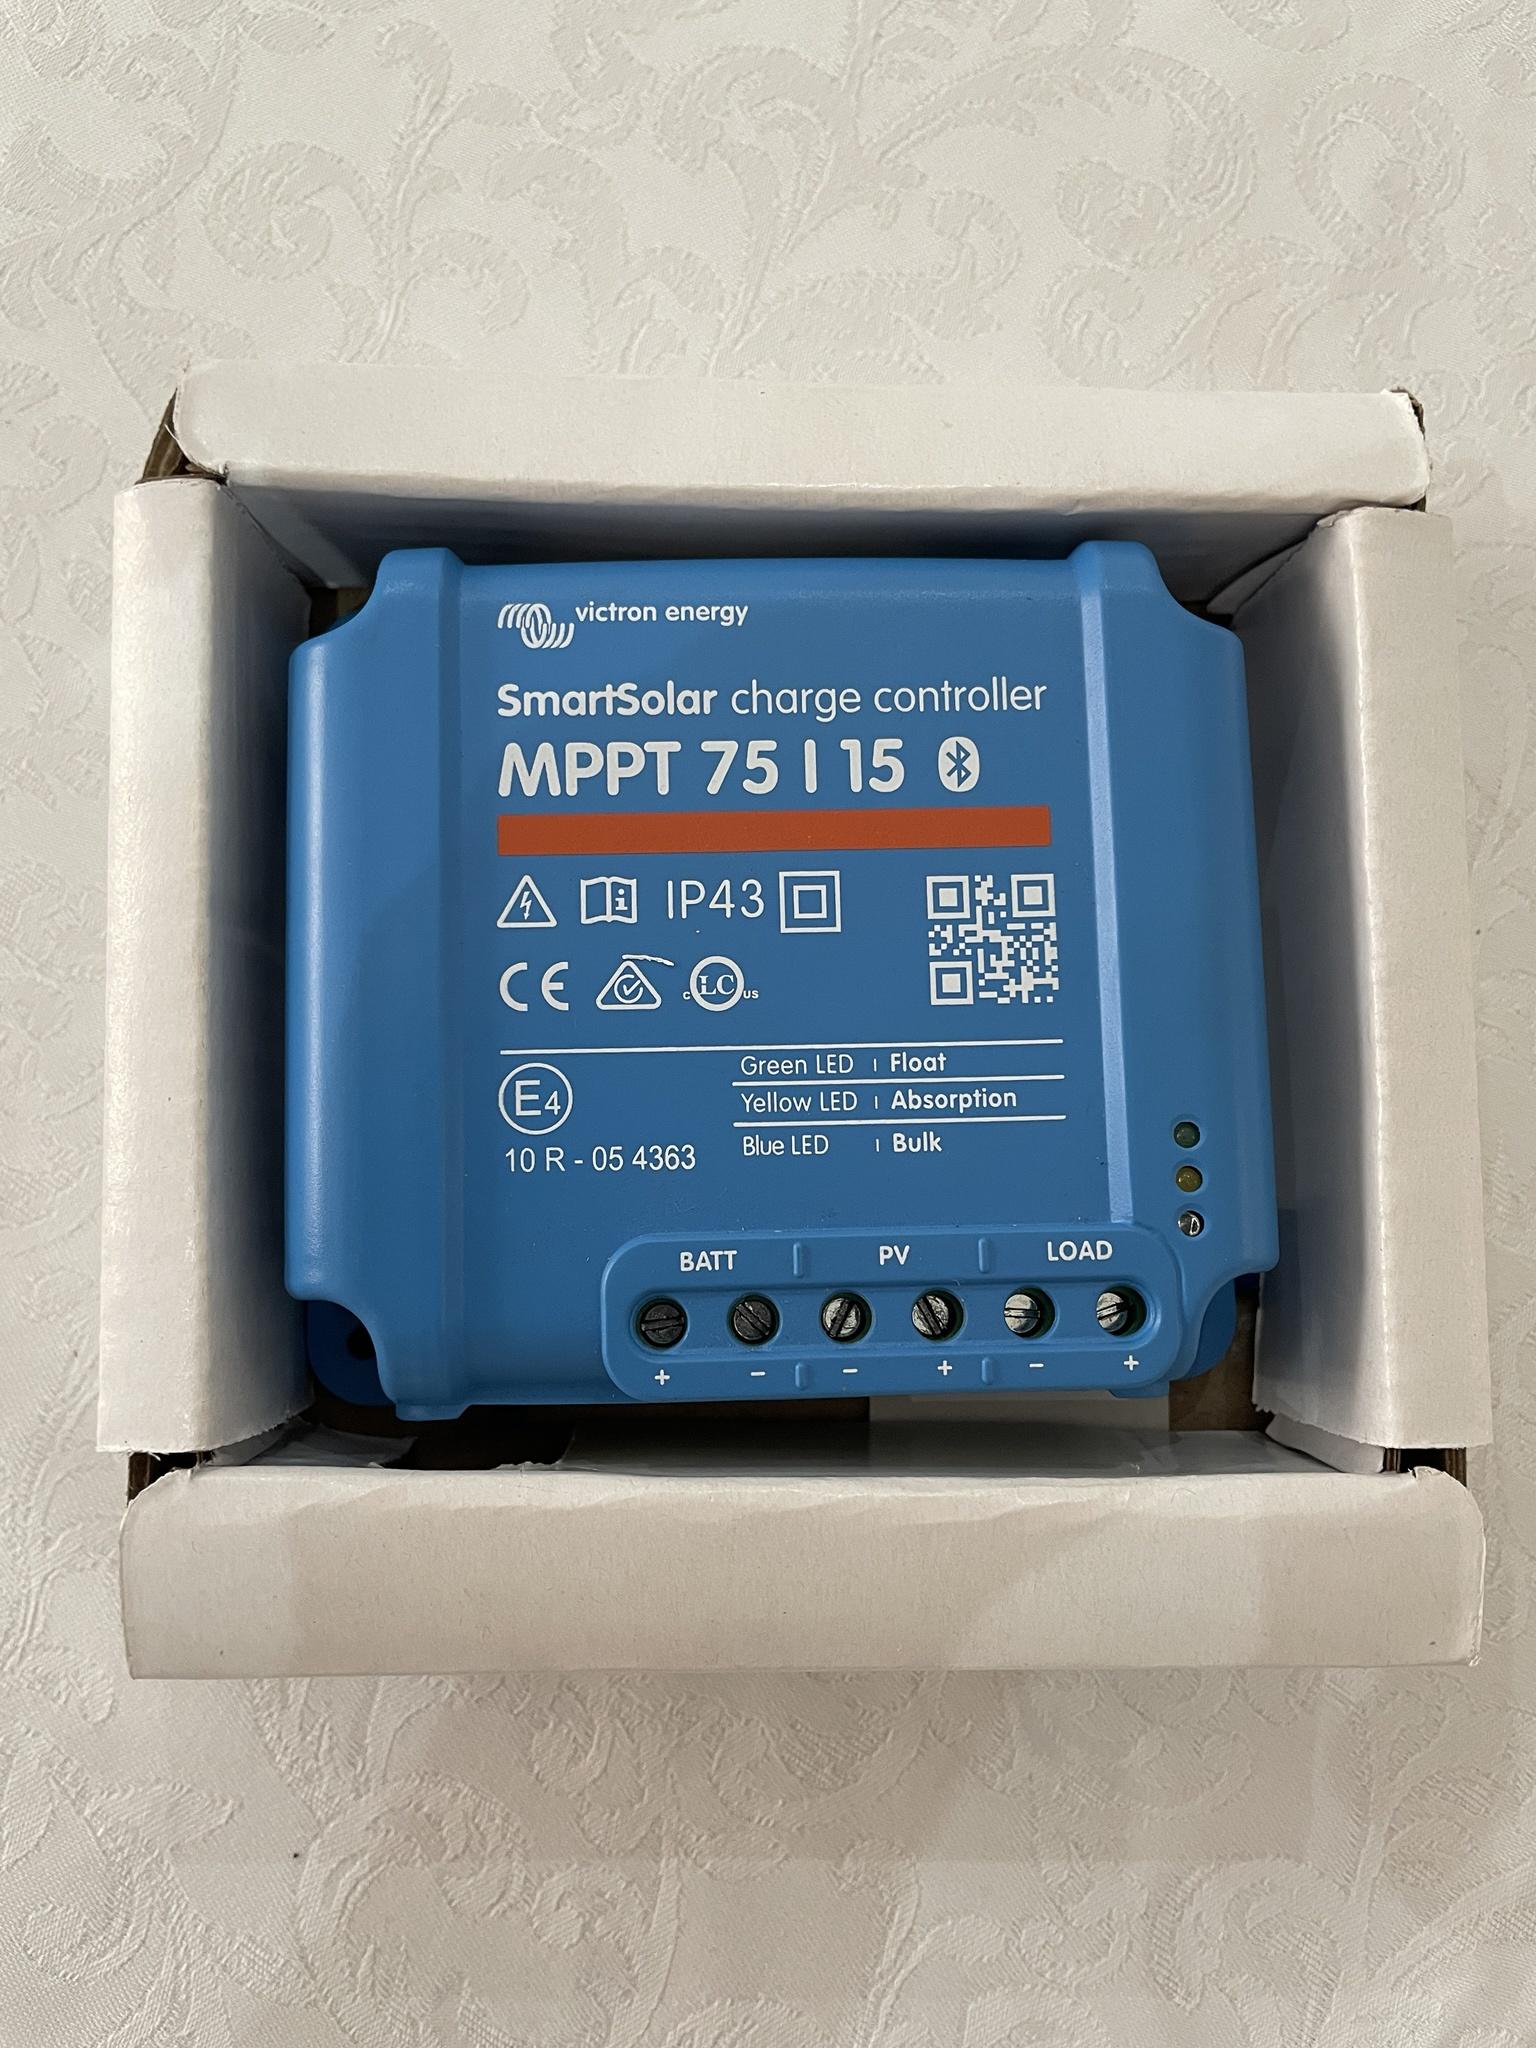
Item: Victron SmartSolar MPPT 75|15 with Bluetooth Age: > 1 year Price: R800.00 Payment Method Accepted: EFT/Geo Warranty: Victron 5 Year - So assume 4 years left Warranty Holder: Victron Packaging: Original Condition: Perfect Location: JHB/Sandton Reason: Purchased as a bundle deal from a user on Cabronite but have no need for it. I haven't tried it but as it's a Victron piece of kit, I have no doubt that it's working perfectly. Shipping: Sure, risk and cost for buyer Collection: Sure Link: Victron Datasheet


-
Thanks for this!
-
-
Encountered the same issue today—everything works fine on the desktop, but not on mobile. I tried re-downloading the plugin, but it didn’t help on the mobile side. Also, I can't seem to find the clear cache settings on iOS.
-
-
-
So glad to hear... :) Sometimes I do find that DF Robot sensors are just weird - had similar issues with one of their ADC but anyway.
-
-
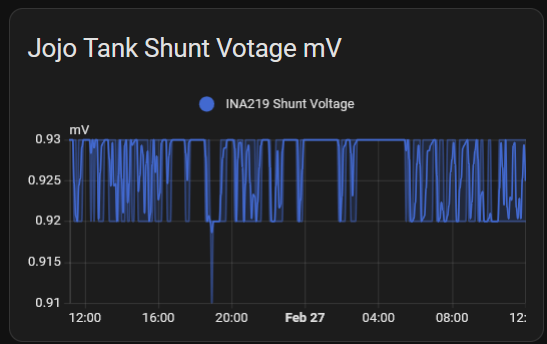
Nicely done....😍 When the community WhatsApp group starts moaning about there being no water, I occassionally go up and take a measurement with the tape measure - mine shows an accuracy of about 98% which works for me... The nerd in me also added in this to keep an eye on the raw readings (anything between 0.92 & 0.93 in my case = 100% capacity) Keep us posted on how it's working
-
-
That looks awesome... sorry about the fried components! I just saw that I didn't reply to your message on the home assistant forum - sorry about that 🤓 Here's the link to the original home assistant forum on this topic: https://community.home-assistant.io/t/esphome-water-level-sensor/126504/582
-
-
-
Hey... Welcome to the world of tinkering I guess I use the DC-DC voltage regulator to smooth out any potential voltage jumps - you could probably get away with not using one and connecting the INA and sensor directly but I do think it helps smooth out the data - this is what was also recommended on the home assistant community forum. The Voltage regullator is putting out 24V - perfect for both the INA219 (Max 26V) and the throw in sensor (12 - 36V, so 24V is the sweet spot I think ) I would deff use a buck converter to power the ESP32. From what I've read, you can certainly cut the cable, it shouldn't make any difference. I hope this helps
-
Good luck on the weekend project - it seems it's going to be slightly different to my setup due to the joined cylinders but I plugged my code into Claude.ai and asked it to provide instructions and described your tank as best as possible. I think it's going to be a bit of a trial and error - here's the code and instructions: # Configuration for dual connected cylindrical water tanks # This configuration assumes two tanks connected at approximately 75% height esphome: name: tankvolume # [Previous WiFi, API, and basic configuration remains the same] sensor: # INA219 sensor configuration remains the same as it's a single probe - platform: ina219 # [Previous INA219 configuration remains unchanged] - platform: template name: "Water Level" id: water_level unit_of_measurement: 'm' accuracy_decimals: 3 update_interval: 60s lambda: |- # CALIBRATION INSTRUCTIONS: # 1. Measure and record the shunt voltage when tanks are empty # 2. Measure and record the shunt voltage when tanks are full # 3. Update these values below: float shunt_voltage = id(ina219_shunt_voltage).state; float full_voltage = 0.00092; // UPDATE: Measure and set your full tank voltage float empty_voltage = 0.00042; // UPDATE: Measure and set your empty tank voltage float max_height = 1.570; // UPDATE: Set your tank height in meters // Calculate water level based on calibration float slope = (max_height - 0.0) / (full_voltage - empty_voltage); float intercept = max_height - slope * full_voltage; float water_level = slope * shunt_voltage + intercept; return std::max(0.0f, std::min(water_level, max_height)); - platform: template name: "Tank Volume" id: tank_volume unit_of_measurement: "litres" lambda: |- // TANK CONFIGURATION PARAMETERS // UPDATE THESE VALUES: constexpr float tank_radius = 0.71; // Set your tank radius in meters constexpr float tank_height = 1.57; // Set total tank height constexpr float connection_height = 1.18; // Set height of connection (75% of total height) constexpr float pi = 3.14159265f; float water_level = id(water_level).state; float total_volume = 0.0f; if (water_level <= connection_height) { // Below connection: Calculate as two separate cylinders total_volume = 2 * (pi * tank_radius * tank_radius * water_level * 1000); } else { // Above connection: Calculate as combined volume // First, volume up to connection float lower_volume = 2 * (pi * tank_radius * tank_radius * connection_height * 1000); // Then add combined volume above connection float upper_volume = pi * tank_radius * tank_radius * (water_level - connection_height) * 2000; total_volume = lower_volume + upper_volume; } return total_volume; # [Rest of the sensors remain largely the same, but update these values:] - platform: template name: "Days of Water Left" id: days_of_water_left unit_of_measurement: "days" lambda: |- float total_volume = id(tank_volume).state; float daily_usage = 1100.0; // UPDATE: Set your expected daily usage in liters float days_left = total_volume / daily_usage; // UPDATE: Adjust maximum days based on your total capacity if (days_left > 7.0) { // Change based on your maximum capacity return 7.0; } return std::max(0.0f, days_left); - platform: template name: "Time to Full" id: time_to_full unit_of_measurement: "hours" lambda: |- float current_volume = id(tank_volume).state; // UPDATE: Calculate your maximum volume based on your tank dimensions float max_volume = 2 * (pi * 0.71 * 0.71 * 1.57 * 1000); // Update with your dimensions float refill_rate = id(tank_refill_rate).state; if (refill_rate > 0) { return (max_volume - current_volume) / refill_rate; } else { return 0; } Here are the key steps for the user to implement this configuration: Physical Measurements Needed: Measure the radius of both tanks Measure the total height of the tanks Measure the height where the tanks are connected (approximately 75% of total height) Calibration Steps: Install the INA219 sensor and connect it to the ESP32 With tanks empty, note the shunt voltage reading With tanks full, note the shunt voltage reading Update these values in the "Water Level" sensor configuration Key Configuration Updates: In the Tank Volume sensor: Update tank_radius with your measured radius Update tank_height with your total tank height Update connection_height with the height where tanks are connected Usage Configuration: Update daily_usage in the "Days of Water Left" sensor with your expected daily water usage Adjust the maximum days cap based on your total tank capacity The main difference in this configuration compared to your original is the volume calculation that accounts for the connected tanks. When the water level is: Below the connection: It calculates volume as two separate cylinders Above the connection: It calculates the combined volume, treating the space above the connection as one larger cylinder
-
We apologise for the frustation caused, please continue to hold while we wait for your parts to arrive Let me know when the INA219 arrives and the struggle shall continue 🤓
-
Hey, At least we've still got our humour, but we'll get this right eventually So I think we should go back to basics here - I've previously tried using some DF Robot Components and I find them to be at times over engineered and just caused frustration and total randomness in terms of the data. EG: I purchased one of their ADS1115 modules and got terrible data - purchased a generic one and it was perfect. Can I suggest you purchase another INA219, which is like mine from PiShop or Communica ? I think this will remove any additional "calibration" etc that the DF Robot requires and we can use most of my code which works most of the time 🤣 Once this is sorted, we can dive into the code and see where's we're at - I still think that your mV reading is too low but I suspect the suggestion above will fix this.