regbes
Members
-
Joined
-
Last visited
-
@Rello if you are monitoring in Home assistant using the AlexxIT / SonoffLAN integration to monitor i found this on the GitHub page Seems to start updating if i open the eWelink app on my phone. Am busy looking into how to flash to Tasmota for these devices.

-
Can I ask why you want to upgrade? Why only the inverter? the system seems to be balanced, so upgrading only one component may not offer huge benefits. R.
-
Thanks Jacques, My batteries seem to take very long to charge, I suspect they may be configured incorrectly, Happy to pay for someone to come and check if they have been installed / configured correctly, could you arrange that?
-
-
-
 regbes reacted to a post in a topic:
What would happen if I attached a 3kw geyser to a 3/5kw hybrid inverter with PV panels but no batteries
regbes reacted to a post in a topic:
What would happen if I attached a 3kw geyser to a 3/5kw hybrid inverter with PV panels but no batteries
-
-
Thought I would share some of my experiences and learnings with my quest to be independent of ESKOM. First some stats of the system that i had installed. 2 x Chase Megarevo 8kva inverters 6 x Chase 6.1 Kwh lithium batteries 22 x Trina 550w solar panels Things to consider in your off-grid journey in South Africa 1. Inverter KW rating (minimum 12KW) In sizing my system, I had to keep in mind the primary purpose was to go off grid or get as close to it as possible. My starting point was to replace the ESKOM single phase input which is 220V at a max of 63A giving a theoretical max from ESKOM of 13.8 KW so I wanted my inverters to be rated for at least that, so I decided that my choices were one 16KW or two 8KW inverters I decided for the parallel inverter setup for the redundancy and added flexibility in panel configuration that it offered. I have not been over the 63A usage often but I have, so this was a must for me. 2. How many panels (As many as you can) There are many calculators and opinions on how many solar panels you should install, and here is my take: Install as many as physically possible. I can’t tell you how many times I regret not getting panels installed on some of the less-than-optimal areas on my roof, Why? Well it seems that most of those opinions and calculators telling you how many panels to install are looking at average sunlight for your location, when going off grid average is not going to cut it, you want worst case, when it is overcast for 3 to 5 days in a row and you start shouting at people for using hot water and your wife is grumpy that the pool is green because you switched off the pool pump, and you looking at the solar app obsessively, when those overcast days roll around you will be glad you put those extra 10 panels in, the additional cost when you do it all at once is far less that calling your installer back to install a few more. 3. Battery KWh (24 hours of usage) These are the most component of the system and hard to get an idea of how much capacity to install, so I went with the following install enough battery to run your house for 24 hours or as close to that as you can afford, it follows from the solar panel logic that you are not sizing for the average day you are sizing for the worst case. In winter when there is less solar production, my batteries hardly ever go under 50% in summer it is almost never at 100% because of all the cloud about. I consider the above the minimum for gong off grid, there are other things to consider when selecting the equipment, you will be using, and the many manufacturers out there offer a variety of features that will interest you, good luck with that choice. Some things I regret, 550w panels instead of 720w the price difference is minimal, Wrong soalrman dongle, the ones I got do not integrate to Solar assistant. Not putting on more panels. The batteries I got seem to only charge at 100A (could be a config issues that I need to look into) A high voltage setup may have been better for my needs. The firmware on the inverters is not very good Some summary stats from solar assistant, the grid usage by the inverters irritated me so I disconnected the inverters from the grid totally in October. The house hold has 3 adults till May when it increased to 6.

-
-
Thanks that worked perfectly.
-
Mu Solar assistant dashboard now has this nice graphic, only problem i am in Johannesburg, cant find anywhere to change my location anybody know how to do this? Thanks Reg

-
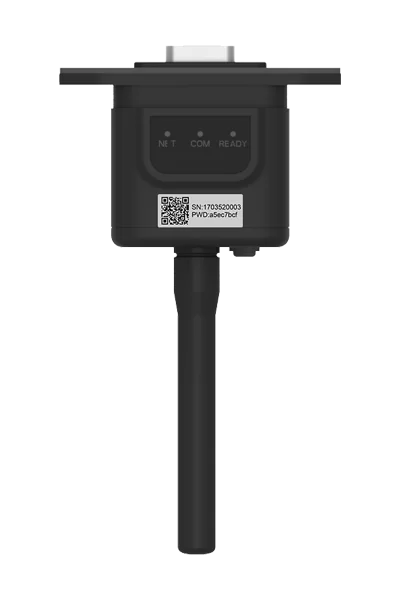
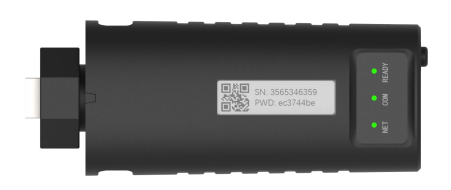
That is great news Johan, what does your dongle look like, i have the LSW-5(the fat one) LSW-3 or LSW-5
-
Yes, it is a bug with Solar Assistant, i have logged a call with them for this and other issues i have found i got this from them about a month ago but it gives me the important things i need, i can wait for the nice to haves. Good luck with the upgrade, If you have a video or instructions for the upgrade please send it on. p.s. the "Sunsynk Power Flow card" works well once you have solar assistant working
-
Hi Johan, being a belt and braces hoarder personality type I'm not looking to get rid of my datalogger/s. Have you tried Chase themselves? i have found them to be very helpful https://www.chasetech.co.za How was the firmware upgrade process? must admit i am worried i will brick the inverters if i try. I found this site with lots of docs and firmware versions just too scared to try
-
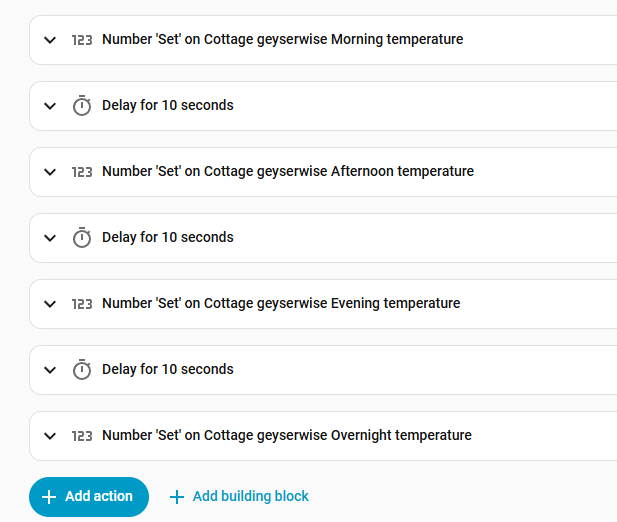
The only way I found to get Geyserwise into home assistant is using Tuya local the cloud wont even recognise geyserwise. The local has better support, and more devices avoid the cloud if you can one you click the Add device in the Tuya local integration it should pick up your geyserwise. things to be aware of with this 1. To set a target temp you will have to set the 4 target temps unless you like the 4 6 hour block method that geyserwise ships with. 2. Because of no 1 above you will need to change multiple settings at once in your automations but the Tuya local gets confused when you do this so build in a delay after you change a setting before changing the next setting if you don't do this only some of the changes will not take effect

-
-
Stats below obtained from Tuya local / Geyserwise integration in home assistant. Needles to say the poor heating performance of the indoor geyser is irritating me, and it may find itself replaced in the near future. Also interesting is how the blanket makes little to no difference in cooling performance. Does anybody have ideas for the heating performance difference? R.
-
-
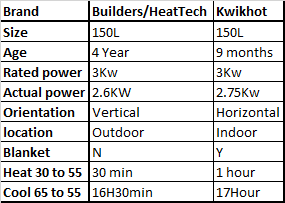
Thanks @phl003 for the links and advice, I was going to buy the cable from Wats247 (even though the shipping was going to cost more than the raspberry of the solar assistant software) but the payment failed. so I decided to go for one of the MacGyver solutions, and I found this https://www.diyelectronics.co.za/store/connectors-wiring/257-female-to-female-sil-jumper-wires.html and https://www.diyelectronics.co.za/store/serial/2808-usb-to-rs485-converter-module-industrial-grade.html and ended up with this p.s. I have never used DIY Electronics before, after this I can highly recommend them, Ordered the items at 2:30 pm and got them the next day. and the shipping was reasonable.
-
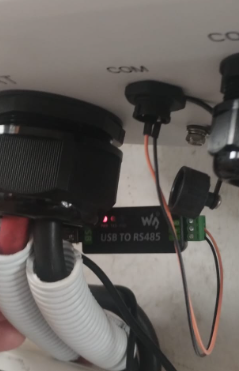
After a few bad experiences with smart switches on high loads, I decided to give it one more try so with my list of requirements I went looking, and I found this. Here : https://www.takealot.com/geyser-smart-wi-fi-switch-energy-monitor/PLID93647687 Some features. 1. Din rail mountable 2. Single slot 3. High Load 63A 4. Sonoff app integration 5. Monitor Power and energy There and many similar devices out there, the reason I liked this one is that it is single pole for the live wire, and a small wire that you connect to the neutral bar. Keeping the DB board neat and installation simple. One note of caution, when the unit is not receiving current e.g. during load shedding or when you run out of pre paid electricity, it will open the circuit, I had installed these on almost all the outputs from the DB board including where I had the keypad for the prepaid meter plugged in, so when I ran out of prepaid, the circuit opened and there was no way for the keypad to communicate with the meter. For the price (+- R700 ) it is a simple reliable way for you to monitor and control your high load devices , I have 11 of these installed in various DB boards around the house and they have been working flawlessly for over 6 months now, I can recommend this device.
-
When I saw this device for sale, I thought that is exactly what I need to control my 2 geysers and pool pump, so I bought 4, 3 for immediate installation and one spare I was sure I would find a use for it. They look great and with the large easy to read display (I had another meter with a display that was so small that it became a pain to read) they met all my requirements. Some of the units features. 1. Monitors power and energy usage. 2. Multiple schedules for on and off. 3. High usage alerts. 4. Uses the Sonoff app with great home assistant integration. 5. Rated for 20 amps. When they arrived and I had a look at them I realised I had not thought the whole installation process through, while they are din rail compatible, they are huge and take up at least 4 slots on the DB board, with not enough space in the board I had to mount them next to the board on the wall and have cable running into the unit and then back into the DB board, ugly and messy. I took the loss and had an electrician do the install, they worked perfectly I had the visibility and control I wanted and saw a saving on electricity, I was happy for about 3 and a half months when one by one the units started to fail, I sent the 3 faulty units back for a full refund, and gave the other away. The only thing I can think of is that while the unit is rated for 20 amps, it just is not capable of handling the loads of my geysers and pool pump for an extend period of time. In short, I do not recommend this device, there are better alternatives for very similar price.
-
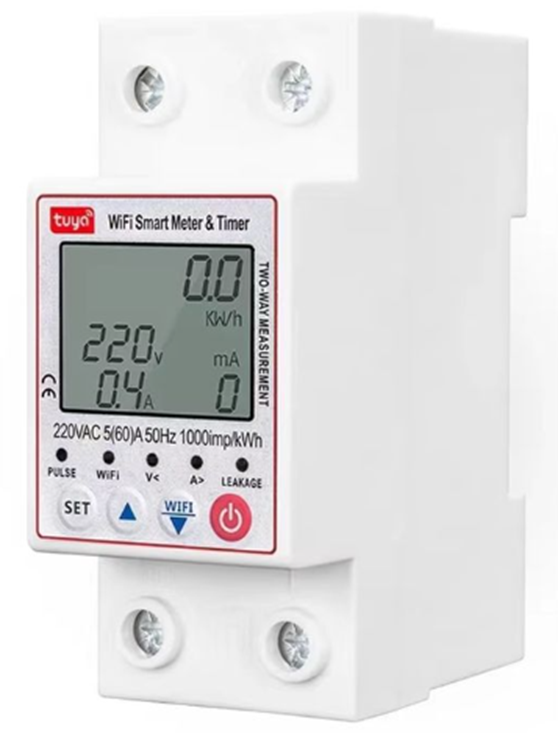
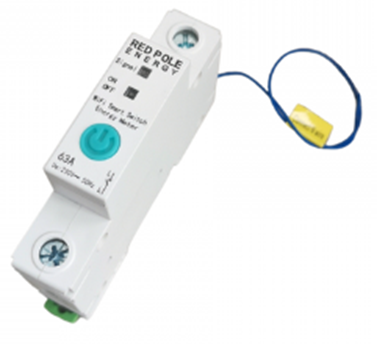
The what I call “TUYA Smart breaker” has been re labelled so many times that there is no one name or description you will find it listed under when shopping for it. It looks like this with some minor differences depending on where you find it I decided to write a quick review on it because I have found it very useful. Ill start off by listing some of the features. 1. Has a Pre-Paid function, I use this to mirror and check my prepaid units, whenever I load up units onto the City power meter, a also load it up on this meter and it will alert me when I am running low, and if you are using it in your connected cottage you can have it switch off if the units reach 0 2. Monitors whole home energy & power usage, with history that you can reset. 3. Has over current detection 4. Has over and under voltage detection 5. Has earth leakage detection 6. Circuit stays closed if supply is disrupted, I like this because on the occasion I have forgotten to buy prepaid, with the circuit closed the keypad maintains communication with the meter so I can load new tokens easily. It can be found online for R600 plus or minus R200 depending on where you buy it and what specials are going. When you consider there are units out there that just offer a LCD screen with current usage and nothing else for the same price, this unit offers value for money. I have had one running without a hitch for over 6 months now, the usage stats I got from this were helpful in sizing my off grid solar installation. Not everything is roses though some drawbacks are To get the full benefit from It, it needs to be installed in your DB board either just before or after the main earth leakage and it takes up 2 slots, so installation can be a pain. it uses the Tuya app which I am not a fan of (i have looked for a Sonoff version with no luck), but using the Tuya local integration in Home Assistant works well and has quick response. My wife is a technophobe so I tried to teach her to use the buttons on the unit and she just does not have the physical strength to push the on/off button so that it registers. In conclusion I can recommend this device.