WannabeSolarSparky
Members
-
Joined
-
Last visited
Everything posted by WannabeSolarSparky
-
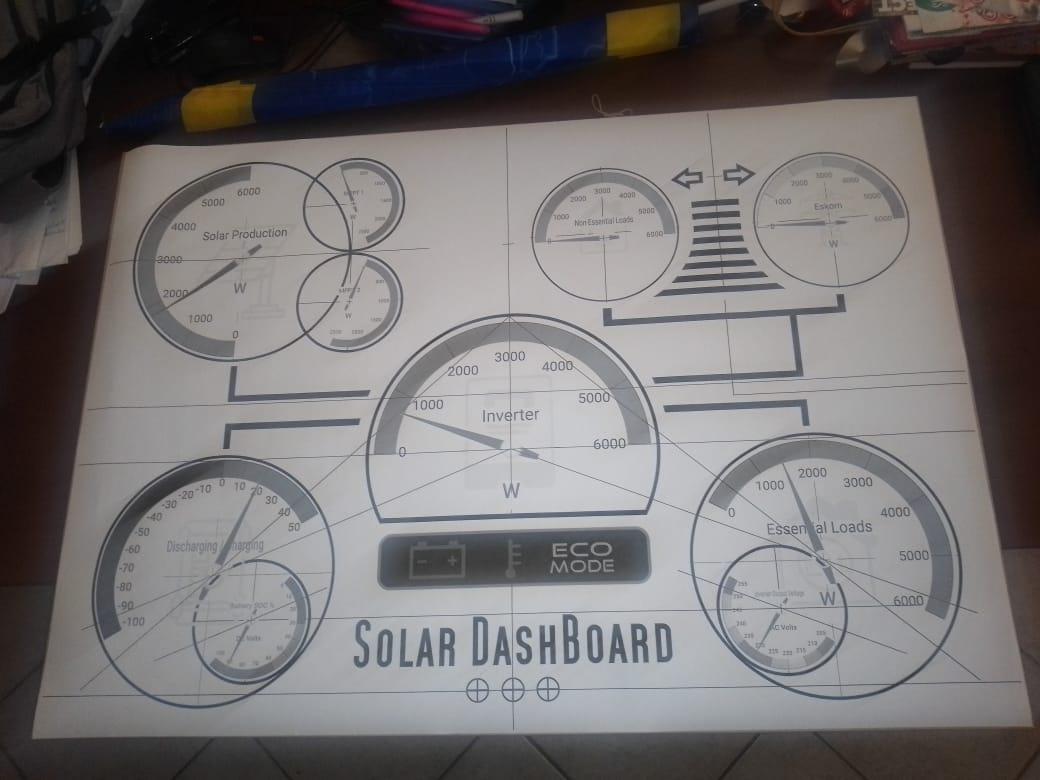
top view

-
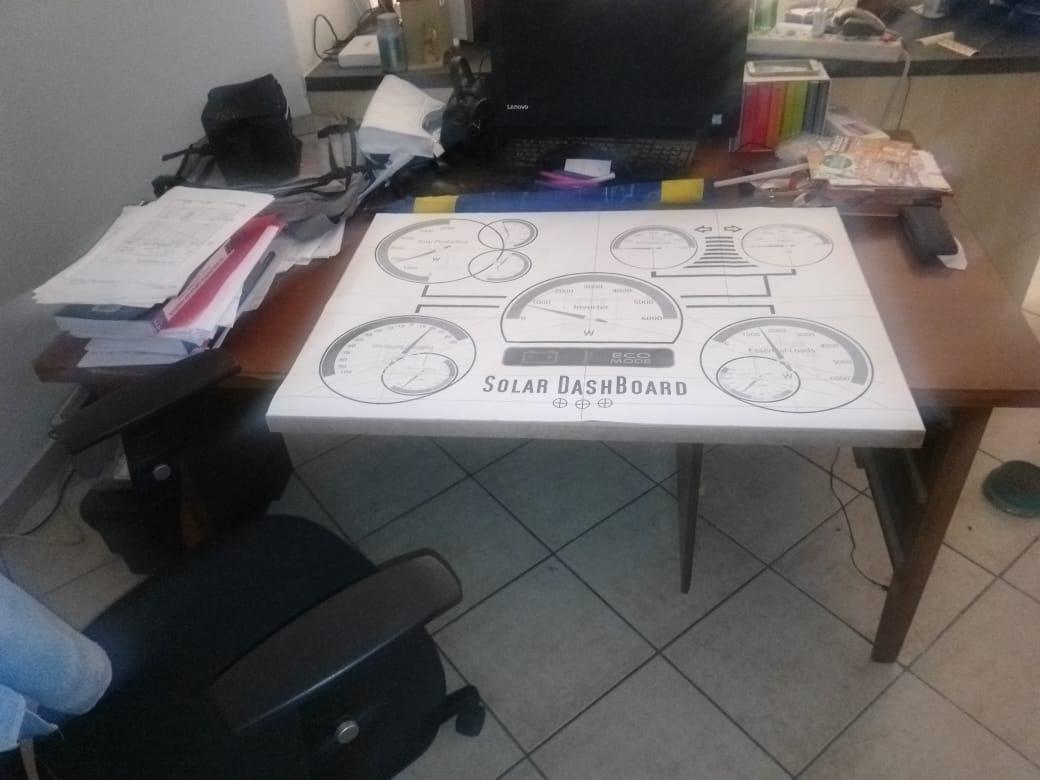
unrolled and laid out on the frame

-
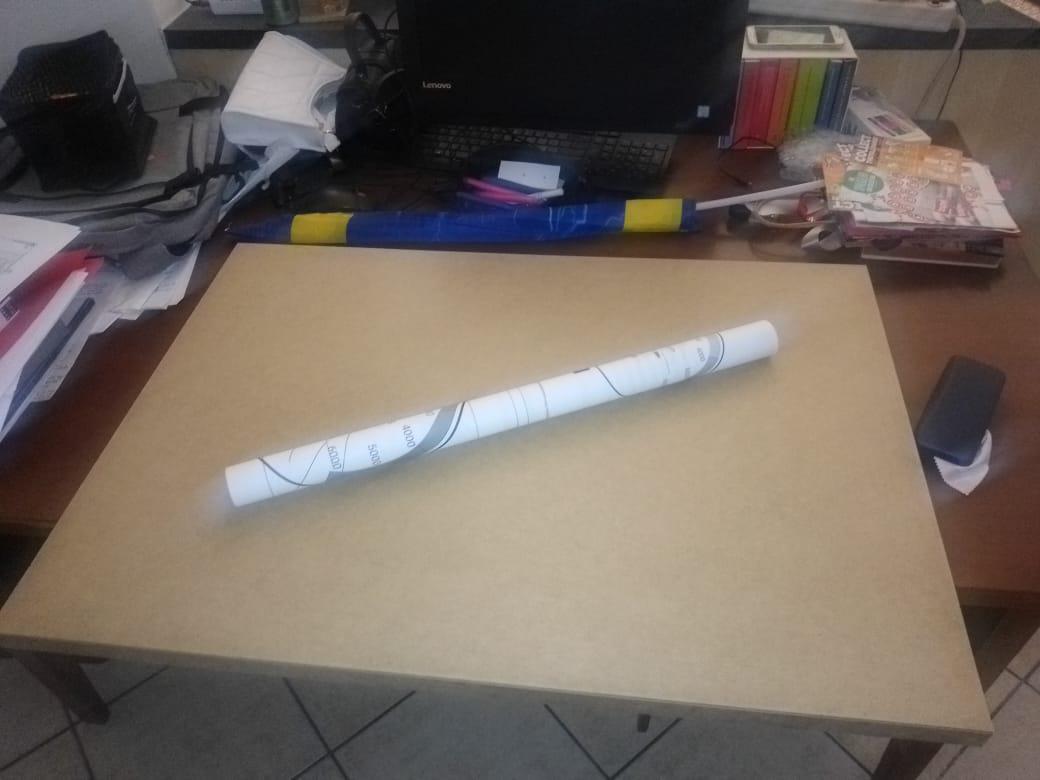
Just received the dashboard frame and 1st test print 🙃🎉

-
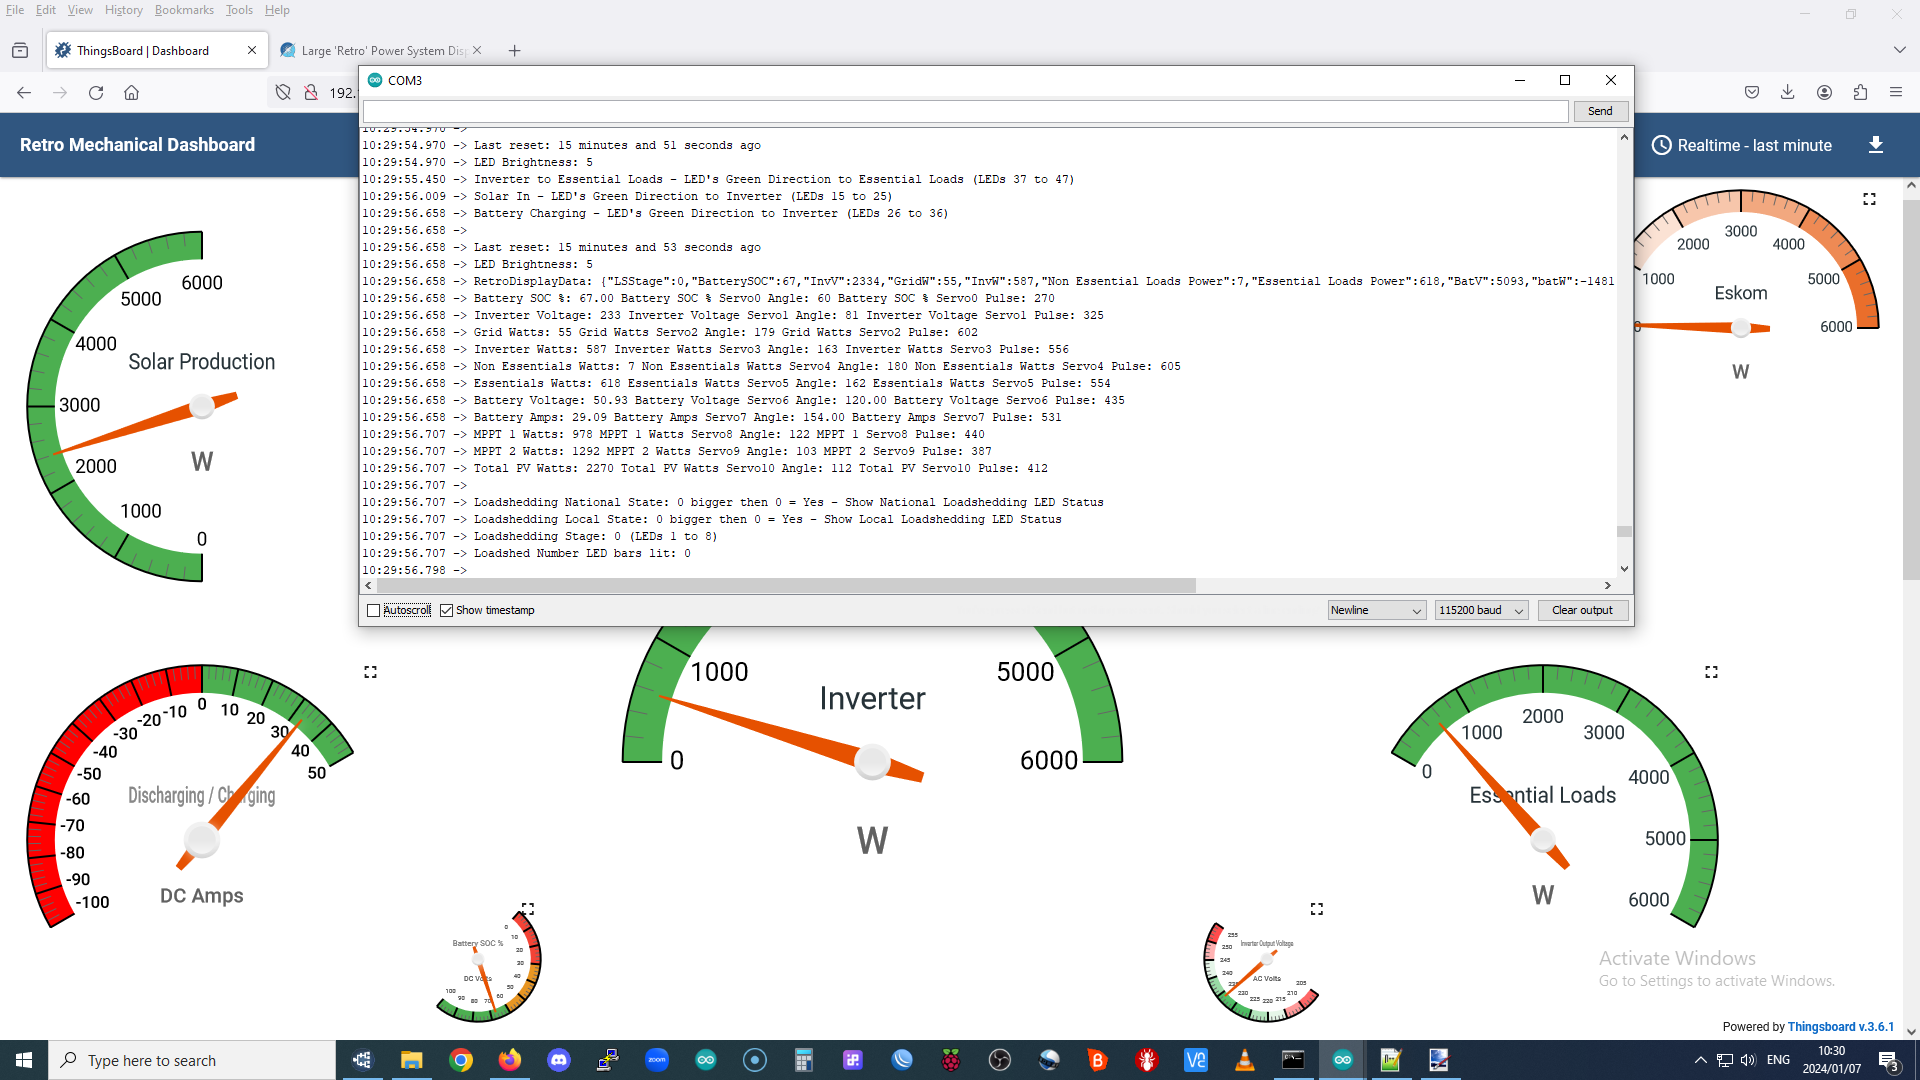
This is how I handle the serial print output Add to the top with all your other defines. #define DEBUG 1 // SET TO 0 TO Disable serial debugging info or 1 to show serial debugging info #if DEBUG #define D_SerialBegin(...) Serial.begin(__VA_ARGS__); #define D_print(...) Serial.print(__VA_ARGS__); #define D_write(...) Serial.write(__VA_ARGS__); #define D_println(...) Serial.println(__VA_ARGS__); #else #define D_SerialBegin(bauds); #define D_print(...); #define D_write(...); #define D_println(...); #endif then change all your Change Serial.print(); to D_print(); and Serial.println(); to D_println(); Works like a charm to switch the serial print on or off You can even add a button to do it for you if you are lazy like me 🤣
-
looking good there
-
Nice they should be with you soon then int FlowSensorValue = analogRead(FlowSensorSpeed_Pin); // A0 pin 36 flowSpeed = map(FlowSensorValue, 0, 1023, 1, 50); int LED_BsensorValue = analogRead(Brightness_Pin); // A3 pin 39 BRIGHTNESS = map(LED_BsensorValue, 0, 1023, 1, 50); Simply using two potentiometers and mapping them in to control the brightness and flow speeds. Currently the flow speeds are simple delays. Once I have done the physical mockup and know the exact number of LED's for each segment then I will recode everything into frames and palettes and eliminate all the delay code bits. I am using the cylon code which gives a nice trail effect to the flows. LED strip + connected to direct esp32 5v VIN LED strip data connected direct to pin 23 - no external level shifter required as the data line is independent of the + line. The 1st led acts as the levelshifter quite effectively. If your 1st led is far away from the eps32 pin then you may need a level shifter. The esp32 puts out more than enough power to drive the data line. Set the max amps to 500ma and max brightness to 50. With those settings I have tested the full strip of 300 led's without any external power and experienced no colour fading or bad data. I am using the Lolin32 WROOM, it's has pretty robust power handling stock standard. I am currently driving all the led's and 10 servo's without external power and have had zero issues with the servo's or the led's colours and sequences. On the final board I will however add an external 5v PS to drive the led's and servo's
-
Coding 90% completed Ticks added, now ready for second test print which will be used to layout the final board, led's, servo's, buttons and brightness pots.


-
Since you are using a JK BMS you can simply use the inverter to do the top balancing, you do not need any special charger. 3.65X16 cells 58.4V. Even more reason to have them nicely top balanced 🥰 Even the worst cells of questionable quality and consistency will benefit.
-
You should take that battery out of service and give it a good top balance and absorption for a day or 2 at 3.65v
-
Currently in SA it is not really worth the effort to do feedback. This may change in future if the processes, regulations and pricing become more favorable. 🤞
-
https://scrapmetaljoburg.co.za/scrap-metal-price-per-kg-south-africa/
-
No idea where these places are though, you may need to do some googling Scrap Metal Prices per Kilogram In Cpt Metal Price Per Kilo Aluminium R42.72 Aluminium Alloy R28.18 Copper R155.10 Brass R118.79 Lead R37.16 Nickel R297.39 Tin R459.80 Zinc R48.31
-
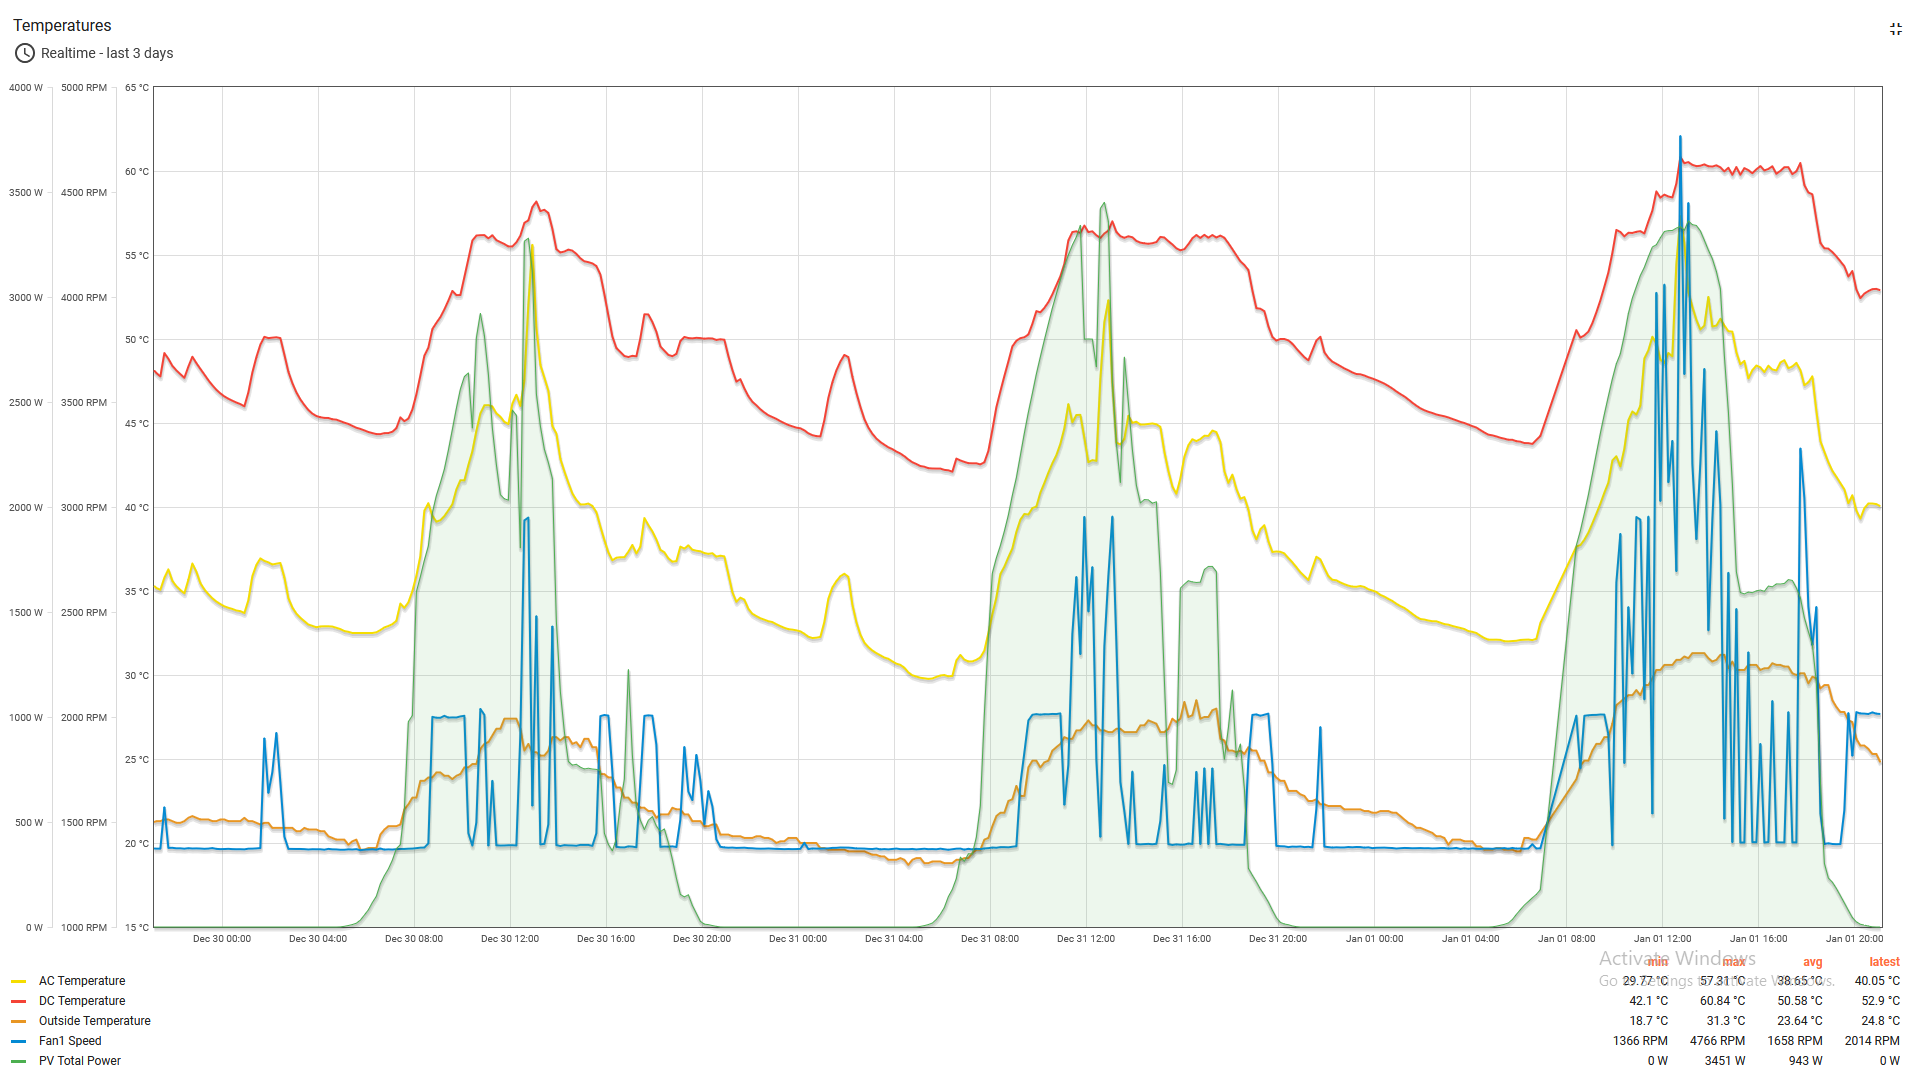
Scorcher in CPT today. 1st time the fans had to actually work to keep things cool 🙃 They managed pretty well.

-
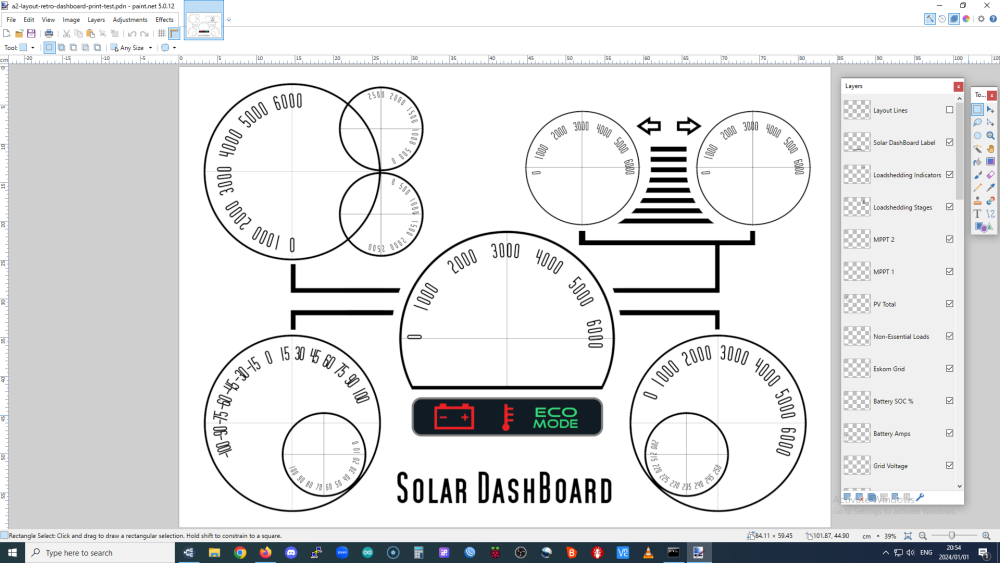
Ready to do a test print at full scale ( A1 - 59.4 x 84.1 cm ). If all goes well then I can fine tune the dials, visuals and add the ticks Next I can start looking at the design of the needles, shape and colours. Once completed the colours will be inverted to white on Dark Grey Background and printed on white vinyl onto an art box frame with a chrome frame edging.
-
These VU type analog meters are also a nice retro type idea for the meters. Pretty much same price as servos and can use the same coding tweaked a bit. https://youtu.be/hsVi-xJLwrc?si=soUyAg_yyeNHbHyI

-
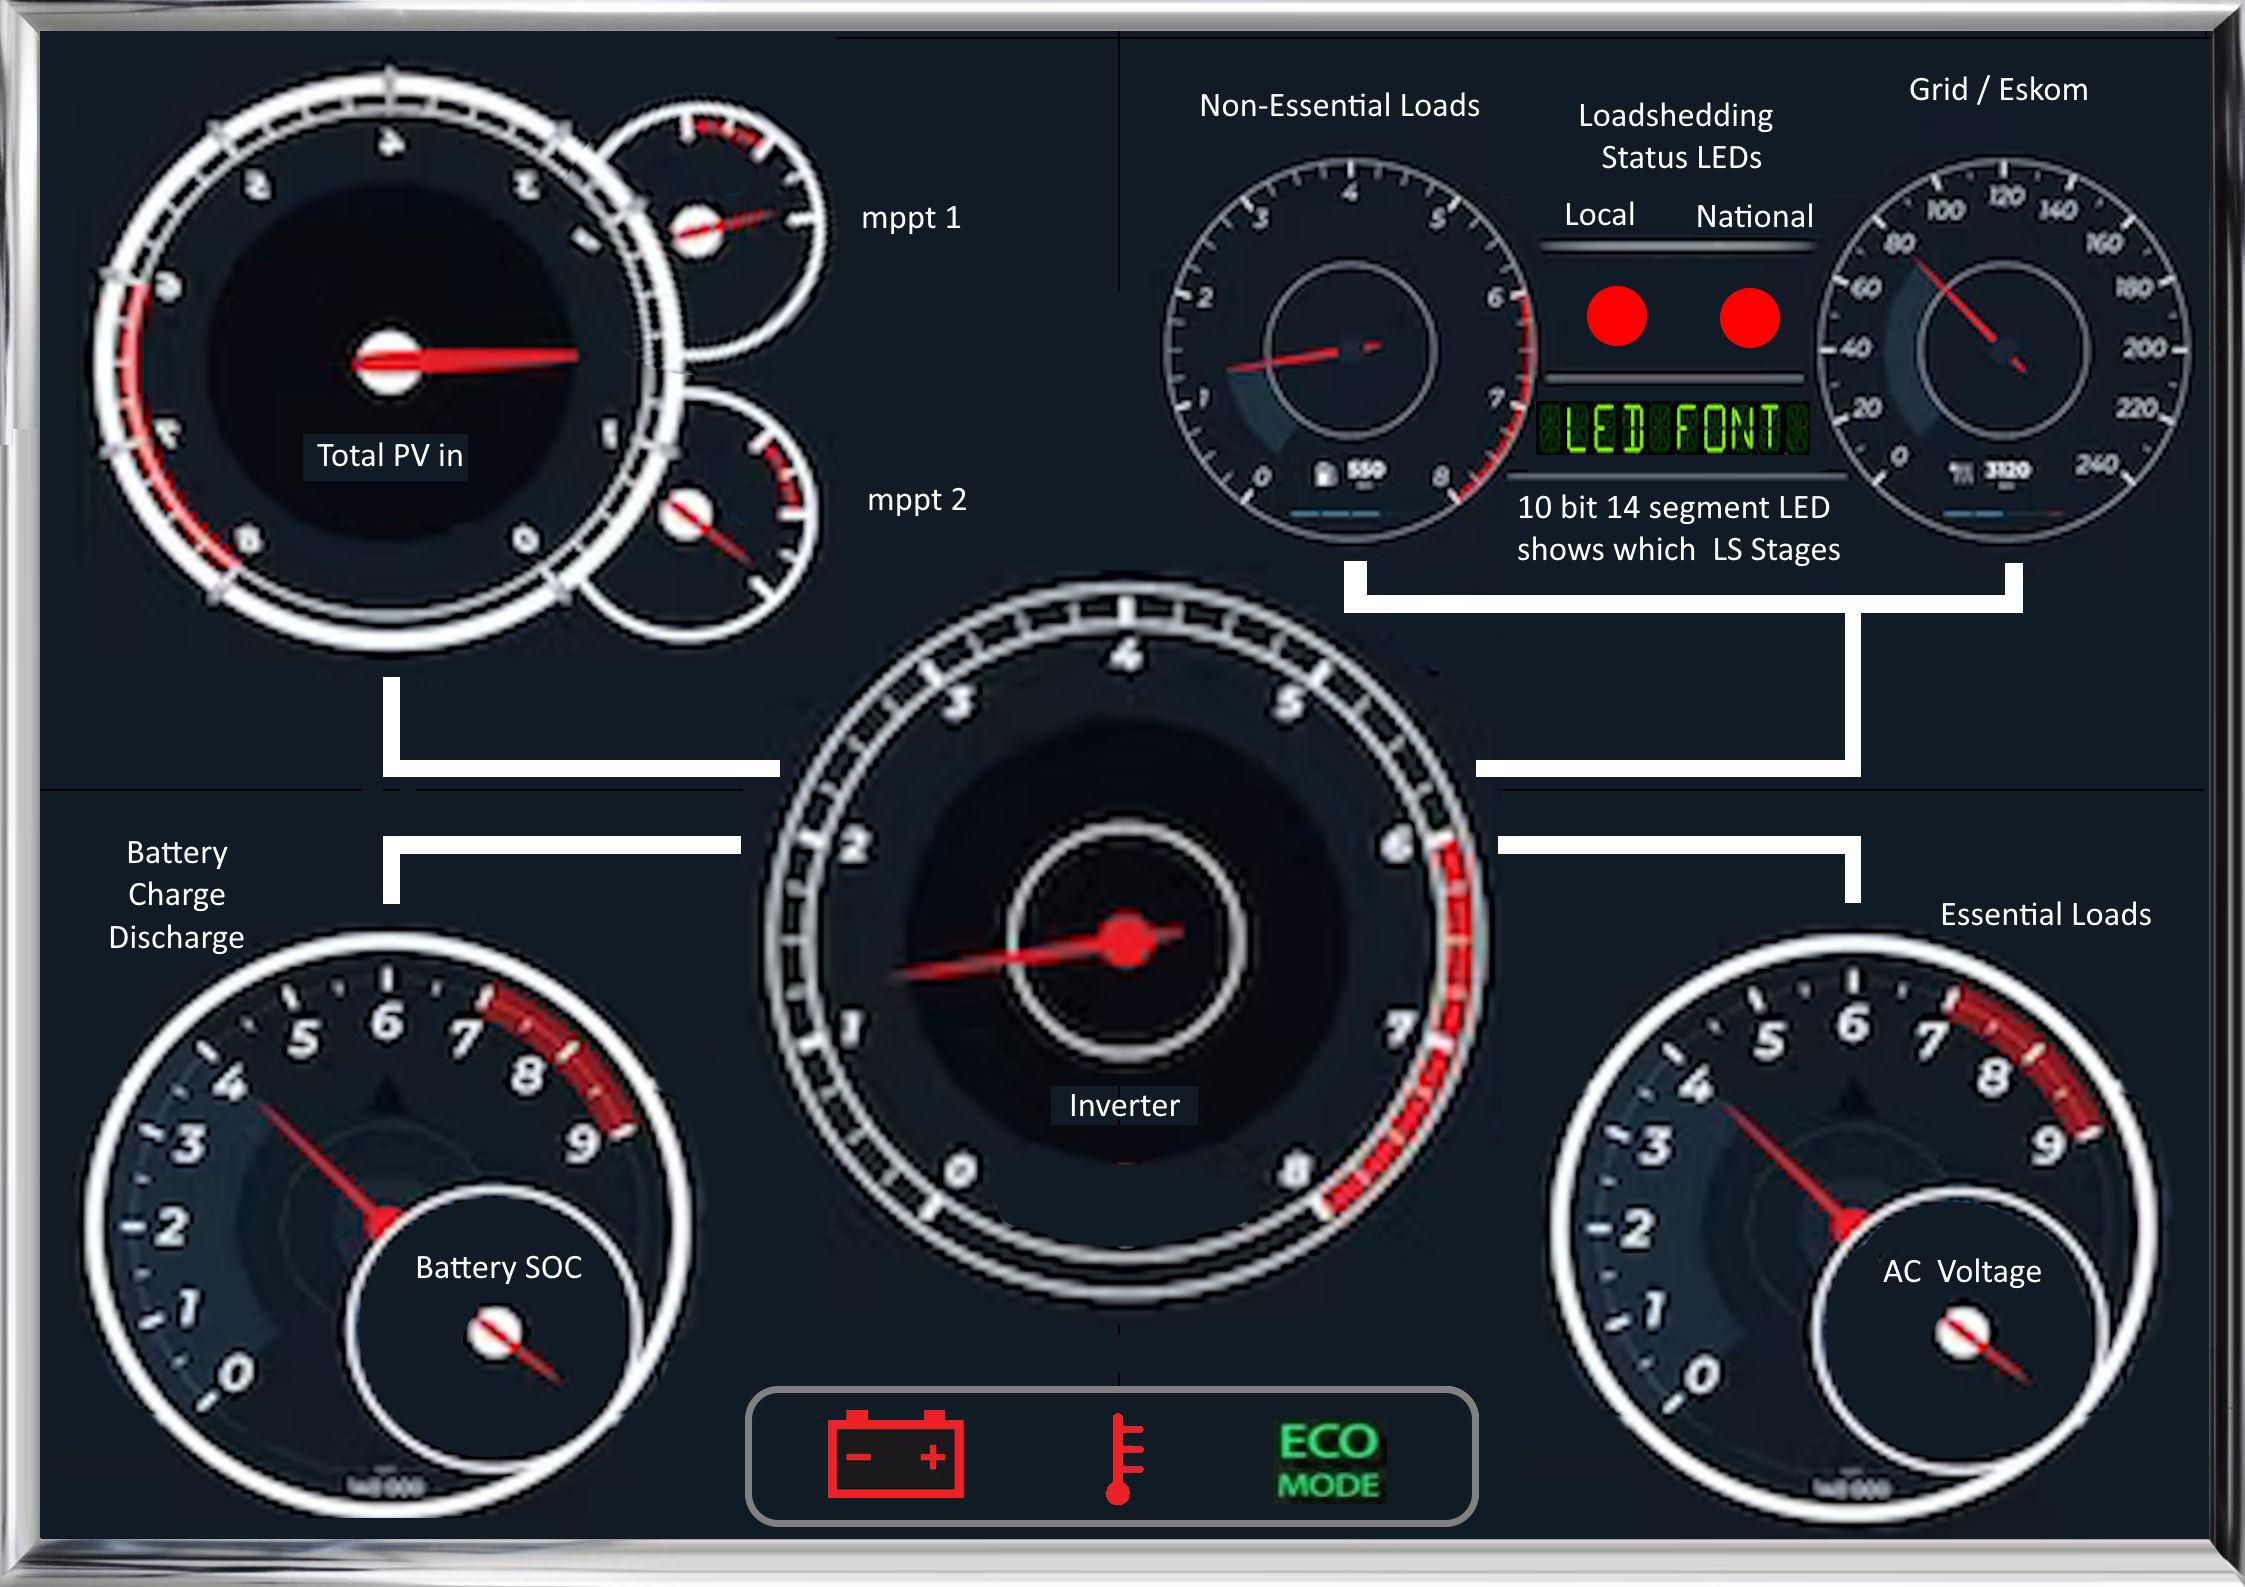
This is just my scribbling so I can figure out a nice layout, will be doing all new hi res images with the correct scales and numbering before taking it to the printers 🙃
-
Deciding on the style look and feel is more complicated than the coding 🤣 Leaning towards a car dashboard type feel with a nice chrome frame. I have also changed the size to A2, my original idea with 100cmX70cm was just way too big.

-
Well it's inside a small cardboard box so it amplifies the sound, but.... it is still pretty quiet. On my way to go find some of that plastic board to test on, but I am pretty confident the sound will be ok on there too. The servos move in very tiny increments and only if the values change by more than 5 degrees so overall I think it will be good 🤞 Will have to see once all the servos are hooked up. Nice, I see you going to give those led strips a go I will also share my code once I have everything working...
-
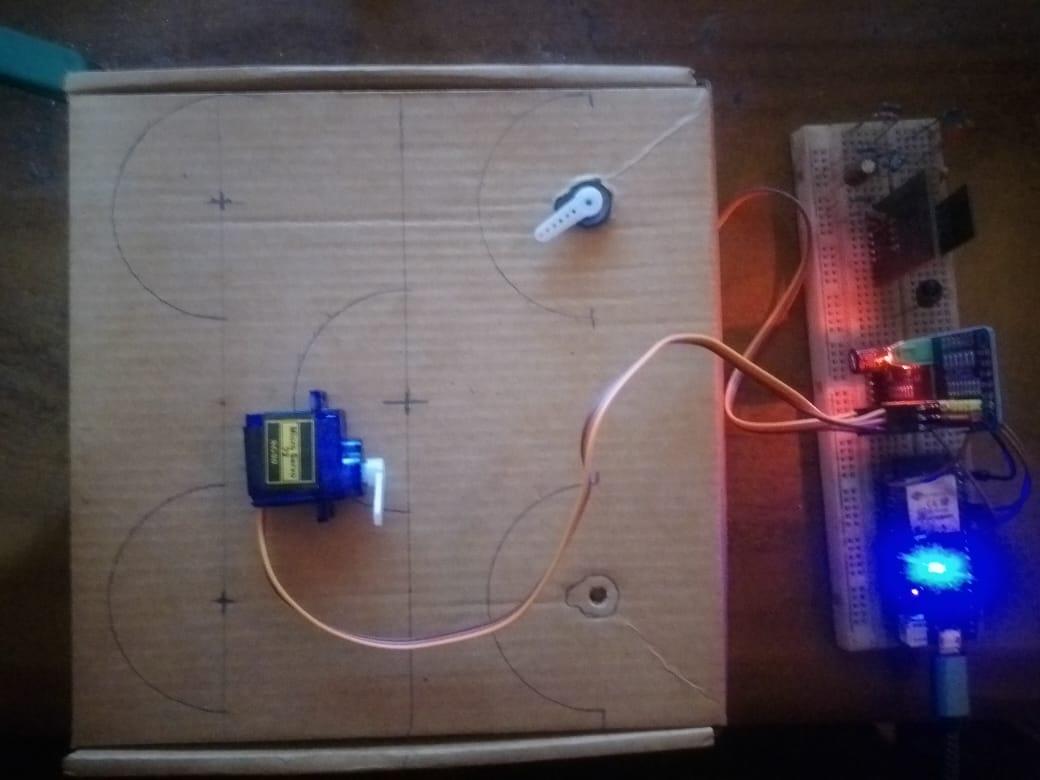
Setup a small test rig on my desk to check the coding for the servo's. Works as expected, just had to reverse the servo directions 🙃

-
I wonder how those systems will handle cloudy days with the sun continually peaking in and out behind clouds?
-
Servos code running nicely.

-
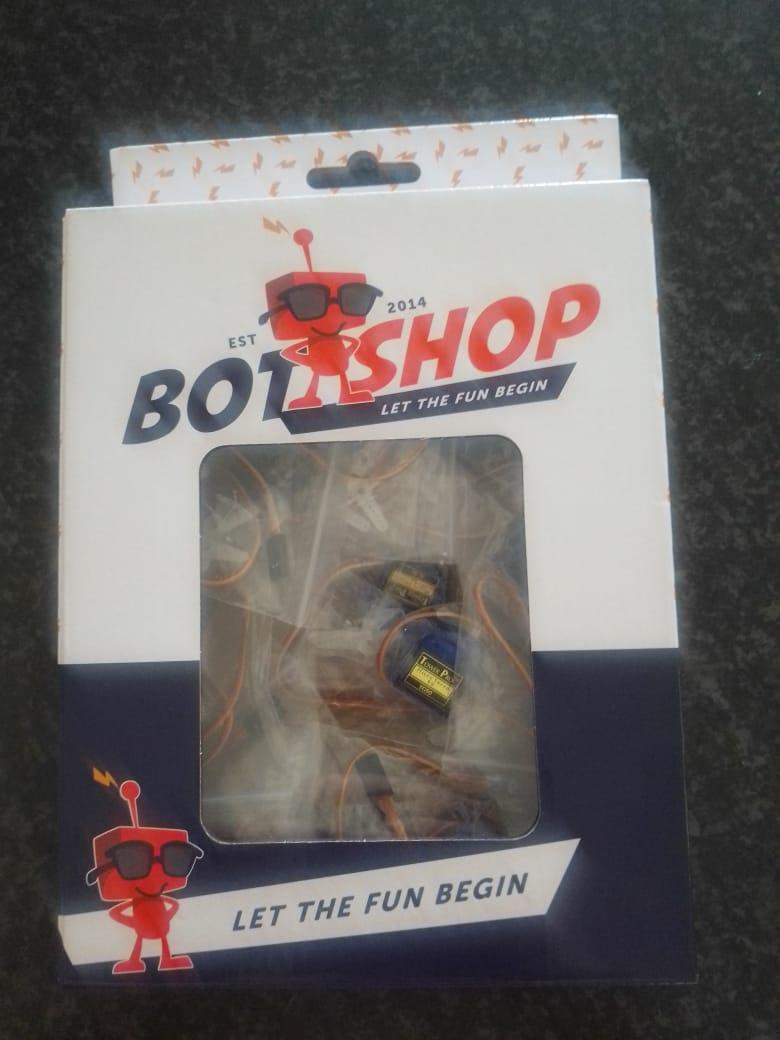
Courier just dropped off the servos and controller 🙃 Just love these guys slogan... they tempting me way too easily 🤣 Also just in time, I finished programming the servos this morning.

-
I am thinking about the board to put everything on... Leaning towards white opaque 5mm correx boards, which is great to print on (dials etc) and the flows leds can shine/glow through and be nicely diffused without too much extra work. Will need get a sample board to test that theory 1st. And on the back can maybe add some foam board for sound dampening. The servos should/could then be isolated from the front correx so sound/vibration should be a lot less as the front board will/should have less chance of amplifying the vibrations.

-
Just finished coding the mqtt, now to start with the servos to use most of that data 🙃

-
Great use of otherwise wasted hardware