hilt_ctn
Members
-
Joined
-
Last visited
Everything posted by hilt_ctn
-
Also a Sunsynk 5kW yes. I have an ESP32 which sends all the inverter info to Home Assistant. That same ESP32 is attached to PWM pins of the fans. The ESP32 talks to Home Assistant to get the AC temp and works with that number as its base i.e. you set the low and high temp thresholds ( you make it anything that suits you ), the fans spin slower at lower temps, and ramp up as the inverter temp increases. ESP32 powered by a 5V adapter Fans powered by a 12V adapter ( which also powers a Wi-Fi access point, so it was there already ) Grounds of both power supplies are tied together via the ESP32 ( very NB ) To be clear, you can make something like this a standalone by adding a local temperature probe instead of getting the info from the inverter. I have such a setup cooling some other kit in a tight space
-
You in Cape Town ? Hehe. You describe what being in CT has been like the last few weeks. Feels like Durbs ! I also do fan assisted cooling via 3x 80mm PWM ( fan speed varies based on temp taken from the inverter itself ) at the bottom of the inverter, as the garage where the inverter lives turns oven-like in summer. Current temps are : DC 71.6, AC 52, Battery 29. So to my mind at least, yes, your temps are reasonable
-
Before loadshedding, I had a Kaco Powador 5kW hybrid inverter ( long story ). What I didn't have was a battery. Enter full-on loadshedding and I had to make a plan. So, changed to a Sunsynk 5kW to facilitate a battery but made no changes to my existing panels other than splitting them from one string to two. From my experience, the Sunksynk is getting as much ( read : maximum ) out of the panels as the Kaco did. So 100% it's not a straightforward Sunsynk vs. Victron comparison.
-
Apparently the Gree integration is worth a shot : https://community.home-assistant.io/t/jetair-or-jet-air-airconditioners/857136
-
@Reiniervd Completely normal. See here As @Sidewinder stated, it's the result of dirty power coming into the house and the inverter not liking it When left alone, it should reconnect when the power is clean enough again
-
City of Cape Town Rates Calculator - https://www.capetown.gov.za/Family%20and%20home/residential-property-and-houses/private-properties/rates-and-tariffs-calculator It shows what you're currently paying vs. what you will be paying under the new proposed rates, which are currently being reviewed due to ( warranted ) public pushback
-
I don't use Solar Assistant. So shooting blind here. If I look at their documentation, specifically the broker setup : Under the "configuration" tab, enable customization. This will make the MQTT server (mosquitto) look for config files under /share/mosquitto for customization config. So the config file path should be /share/mosquitto/solar_assistant.conf as reflected in their log file. Looking at your log file, your setup appears to be pulling file /etc/mosquitto/mosquitto.conf which is a default location and default file. Unless you've edited this file to include the Solar Assistant MQTT bridge code, the broker will have no knowledge of the Solar Assistant host To my mind you have two choices : Within Home Assistant, start again with the steps listed for broker setup ( preferred for Home Assistant users ) to include the bridge code If you're feeling adventurous, edit /etc/mosquitto/mosquitto.conf to include the Solar Assistant code Use it, don't use it :)
-
Sweeeeet. At least they're coming :) They will load up the new meter with the same amount of units
-
Email [email protected] and ask them for a time and date. They likely won't respond on email. But your phone will mysteriously ring a few days later with someone asking when it's convenient to swing by. I had to mail them 3 times before this happened
-
They don't make them like they used to ;)
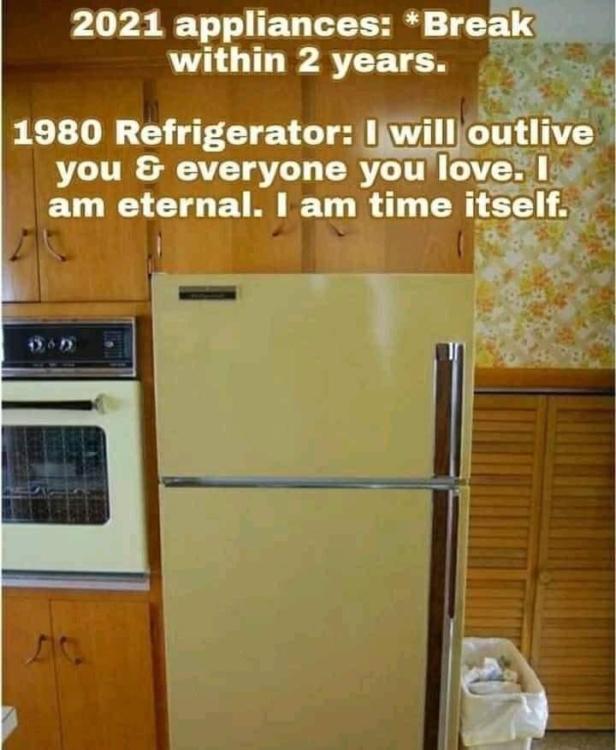
-
Worth a watch : https://www.youtube.com/watch?v=xn03N3b0-lE
-
I fully understand that this is one of those " your mileage may vary " sceanrio's ( the science is not negotiable ). But the output from my CBI Astute running a bog standard Speck Pump Porpoise 750W shows that even on startup the pump hovers well below 3.5A. But that's me The Astute ( a smart breaker ) needs to be in conjunction. i.e. currently your wiring in your pool sub-DB is likely : Mains -> Pool pump breaker -> Old timer -> Pump. It would need to be Mains -> Pool pump breaker -> CBI Astute -> Pump This sums up how it would look : https://www.youtube.com/watch?v=J5d54jyDpBY from about the 1:45 mark In short, you can't replace the pool pump breaker with a smart breaker. Both need to be there Note I'm not a sparky
-
The API key is an easy fix. Here's an example : # Enable Home Assistant API api: encryption: key: "KVhNQiXuNb4nQ6MmR/FknD4RVwJHv790RtCqhVa7xX4=" This is a good page to hold on to. Under Configuration Variables section, you'll see a randomly generated API key. If you refresh the page, it generates a new key. Nifty for future ESP projects if you see the same issue To Home Assistant. What you're seeing in HA is the sensors, entities and sliders that have been created on the ESP by the code. So they will always show up regardless. But the ESP clearly isn't able to read/write values ( all the Unknown's you're seeing ) from/to the inverter. If you check the ESP log in ESPHome, you'll see that too. So it might be the cabling I also followed Scoobs video when I first setup. Note that there are two different cable colouring standards when it comes to Ethernet cables. Despite checking and swearing that I had the correct standard for my cable, orange and white/orange never worked for me. I had to use brown and white/brown. I also removed the R7 resistor on the RS485 board ( can't 100% make out from your pic - but it looks like you have removed it ) Note that I have a Sunsynk 5k. So your mileage may vary. But at this point, it's worth a shot
-
That's odd. Below is screenshot from my CBI Isolator. Worth asking - Is the firmware up to date ? If so, I'm wondering if it's a hardware version issue ( I know there are two versions of the CBI ASC for example )

-
An option you could try to test if it's something on the Deco is to turn your phone into a WiFi access point. Connect the ASC to the phone access point and run a timer based automation. Bit of a mission. But you'll at least be able to eliminate / prove the networking variable I too run 4x Astute's using Smart Life. But they're only added to Smart Life so that I can easily pull them into Home Assistant which triggers the automations locally ( using Tuya Local ) and doesn't rely on the cloud functionality at all
-
For the electronic options : The problem with the ultrasonic sensors is that condensation can really mess with the readings ( GreatScott might not have that issue...yet ). The same is true of Time Of Flight sensors in tanks Muttley did this. If you read through you'll see that calibration took place with the sensor both in and out the tank. So that might be what you're looking for. Not too a cheap solution though If you want to go cheap, nasty and adventurous, you could have say 3 or 4 horizontal float sensors mounted at different heights inside the tank that trigger as the level drops or fills. But that would involve drilling holes in the sides of the tank ( for the wiring ) and obviously sealing them holes up properly. :S
-
This may help
-
Aaaand there's this https://mybroadband.co.za/news/energy/565365-cape-towns-hidden-solar-fees.html Well worth the read as it opens the full can of worms
-
Quick answer - I'm no expert ( more below ), but if you turn off your SOC Timer and let the battery charge to 100%, leave it like that for several hours. The battery BMS should then level the cells. If possible, do this during the day so you're not paying Eskom too much if anything at all Long answer - When I first had my system installed ( Sunsynk inverter, SolarMD LifePO4 battery ), in the darker months the battery never made it to 100% as I had the SOC set too low via the Timer. One night during load shedding, the battery claimed to have 30% left and suddenly we were plunged into darkness. So I did the research and learned the lesson that solar is not set and forget. The reason for the above dark evening was that the battery never had a regular chance to level the cells which my BMS does when the battery SOC reaches 100%. The BMS readings were waaaay off. So ! I adjusted my SOC ( Eskom can have some pennies ) and every 3 or 4 days, I'd turn off the Timer to let the battery charge up and level. No problems since. I've since automated this with Home Assistant. It keeps an eye on how many times the battery hits 100%. And if it doesn't hit 100% every 4 days, it flips the Timer switch and flips it back after several hours. One step closer to set and forget To be clear, this was only a darker month issue for me. Summer I have no issues with reaching 100% with a much lower SOC set. The system actually produces more than I use in summer
-
1. For HA, the Input text integration allows the variables password or text for the mode setting. So within you prepaid YAML file, change mode: password to mode: text and you'll no longer see the asterisk's. You will however see some funky math happen. So it's probably not 100% what you're looking for. But that's how this calculates the units remaining 2. Not sure what's trying to be achieved here. This is a rolling total i.e. it counts down units remaining as your house uses power. Why would you want to input a value at a specific time of day ?
-
The only thing else I can think of is trying my pinouts which makes use of the other set of TX/RX pins for the UART/serial comms. One thing I've learnt is that not all ESP boards are made equal. Here's an example of such. This is a guide to get a mmWave sensor working. As this gent discovered, conventional wisdom says use GPIO pins 1 and 3. But he never got it to work. He used pins 16 and 17 instead. So this proves that although both these pairs of pins are effectively serial pins, they aren't 100% the same
-
This isn't necessary. I power all sorts of 5V devices ( dallas temp probes, VL53L0X, Neopixel ring lights) off the ESP VIN pin directly when powering the ESP with USB. Works 100% with this particular style of TTL board. This is the MAX485 chip rated for 5V
-
Interesting. On surface value we have the exact same boards. I have R7 removed on the TTL to RS485 board. I used pins 7&8 on the Ethernet cable I used different pinouts ESP side. But this likely doesn't matter based on what follows. I had a look at your code and compared it to mine ( I'm running an older version ), specifically the UART, modbus and modbus_controller settings i.e. the stuff that makes it work. There I spotted a missing 0 from your address in the modbus_controller settings section. So I went to slipx's repository and had a look at his yaml's. Sure as nuts, they're all 0x01, no 0x1 I'm no code guru. And if I google the difference between 0x1 and 0x01 they seem functionally similar although not 100% the same ( the more I read, the more confusing it becomes) . But give is a whirl anyway. Changing code will cost 5mins !

-
This is the wiring diagram I used. I added your pics for context Looks like your Ethernet cable conforms to the T568A standard. See the highlighted green blocks. If so, it appears that for pins 1 and 2 at least that the green/white and solid green are reversed. See highlighted orange blocks That said, I did mine a while back and it started out not working on pins 1&2. I ended up using pins 7&8 ( brown/white and brown ) and that sorted me out. I know that bridging shouldn't cause issues as you have the pairs correct. But we've seen stranger things. I'd try undoing that and trying with just green/white and green per the wiring diagram. Failing that, try using pins 7 & 8 ( brown/white and brown )

-
More on this - Others experiencing the same